Scheduling Jobs
To run a job on a schedule, check off Run Job on a Schedule and then configure the schedule options. The following schedule will run the job every 30 minutes between 6:00 AM and 6:59 PM every weekday:

When a job is scheduled to run automatically, the next time it will run displays in the Next Run column of the main screen:

 If you don't see the Next Run value populated for a job that you have scheduled, then make sure that you have checked off Run Scheduled Jobs on the Tools menu.
Schedule Examples
- Run at 5 AM every weekday morning: Check off Monday, Tuesday, Wednesday, Thursday, Friday. Set the interval to every 1 Hour(s) between 5:00 AM and 5:01 AM. As long as the interval is longer than the time the begin and and end time, the job will only run once.
- Run every hour every day: Check off all the days. Set the interval to every 1 Hour(s) between 12:00 AM and 11:59 PM.
- Run at 7 AM and 5 PM every day: Check off all the days. Set the interval to every 10 Hour(s) between 7:00 AM and 11:59 PM.
Run Jobs in Windows Service
 The Windows service must have access to any of the resources Sync & Save will connect to.
 - Open the Services control panel by searching Services on the Windows start menu.
- Find the Sync And Save Service in the list, right click and select Properties.
- Select the Log On tab and select the specific user account that the service should use.

One limitation of the Windows service is that mapped drives may not exist in the context of the service. All drive paths configured in Sync & Save jobs should be to local drives or should use the UNC path instead of the mapped drive letter.Run Jobs in User Interface

- Select Current Account to restrict the Sync & Save jobs to only run when the current user is logged in.
- Select Run Sync & Save when the current user logs in to start up Sync & Save automatically when the current user logs in.
There are several limitations to running Sync & Save in the user interface:- The user must be logged in and Sync & Save must be running for the scheduled jobs to run.
- There may be errors if more than one user is logged in and attempting to run jobs at the same time.
Run Jobs in the Task Scheduler
The Windows Task Scheduler can be used without the need to configure individual Windows Tasks. Just select Tools > Options > System > Run Jobs In > Task Scheduler and jobs will run even if no user is logged in:

You will be prompted to enter a windows user name and password that the task will use to run even if no user is logged in: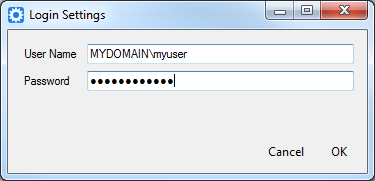
Note that if you have existing manually configured Windows Tasks you should delete the manually configured tasks so that the job runs are not duplicated. If you select Use Windows Task Scheduler, Sync & Save will create a single Windows Task named SyncAndSaveTimer.
Sync & Save will not appear on the screen when jobs run automatically, even if a user is logged in.
Manually Configuring The Windows Task Scheduler
If the built in scheduler does not have enough options you can also manually run jobs using the Windows task scheduler.
If you use a manually configured Windows Task you should not choose Run Scheduled Tasks in Sync & Save, otherwise the job runs will be duplicated.
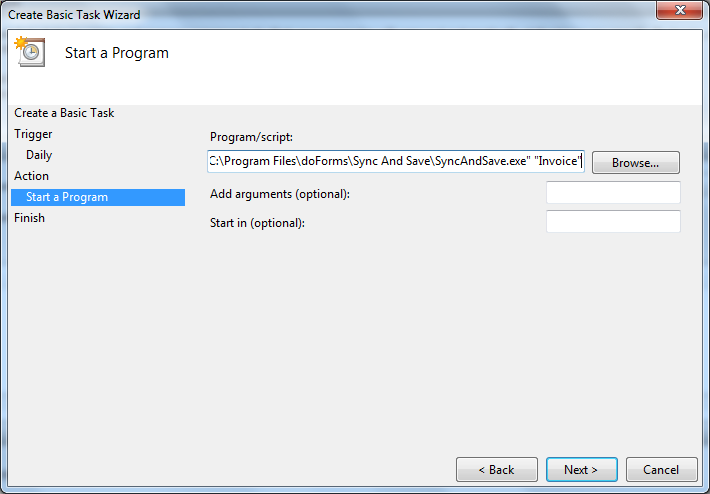
First, copy the command line by clicking the Copy Command Line button on the Settings tab of the job.
In Windows 7, you then open the Task scheduler by going to Control Panel | Administrative Tools | Task Scheduler. In the Task Scheduler, choose Action | Create Basic Task... Give the task a name and select a schedule.
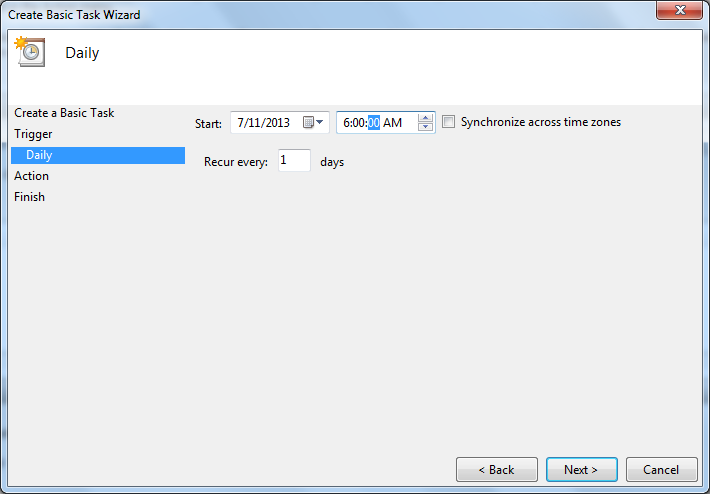
If you need a more complex schedule, don't worry. You can add more details in a later step.
Under Action, choose Start a program. Paste in the command value.
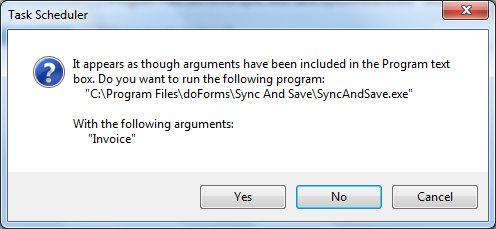
Click Next. If you get this next message, then click Yes to include the job name as an argument:
If you want to run more than one job from the same Windows Task, you can add additional job names in the argument box. Wrap each job name in quotes and separate the values with a space. For example:
"Invoice" "Customer Lookup" "Item Lookup"
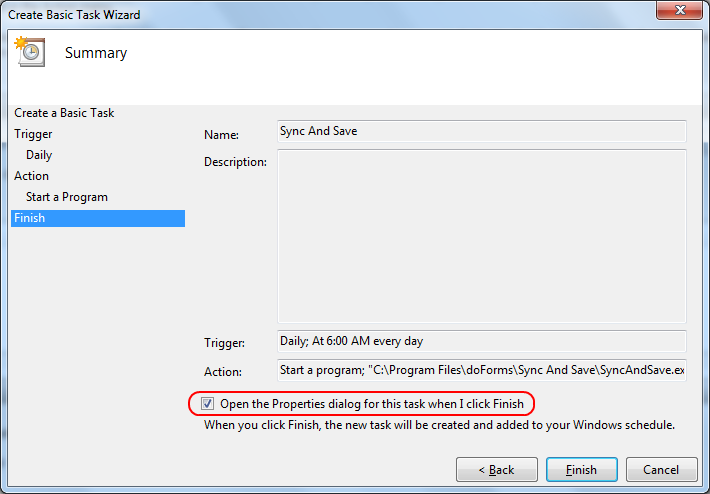
If you want to adjust the schedule or allow the job to run even if no user is logged in, you will need to edit the properties of the task:
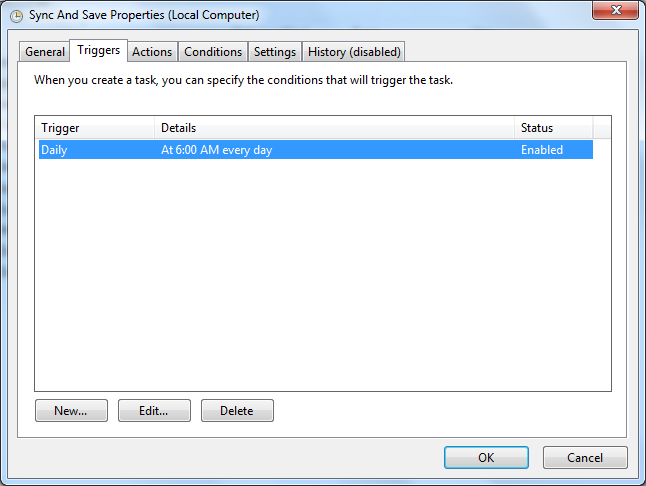
If you need a more complex schedule, select the existing Trigger and click Edit:
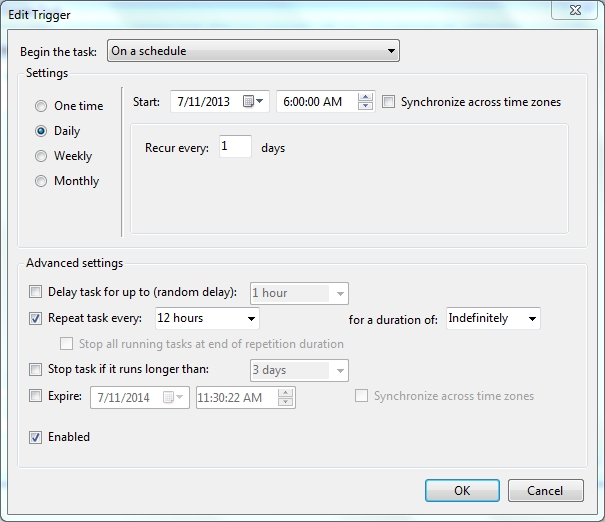
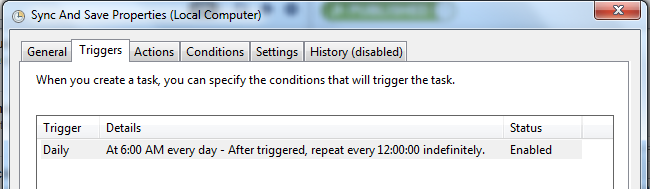
Edit the properties of the schedule. Note that some fields (like "Repeat task every:") allow you to enter your own values. This trigger will happen at 6:00 AM and 6:00 PM every day.
Check the details of the trigger to make sure it is what you expect:
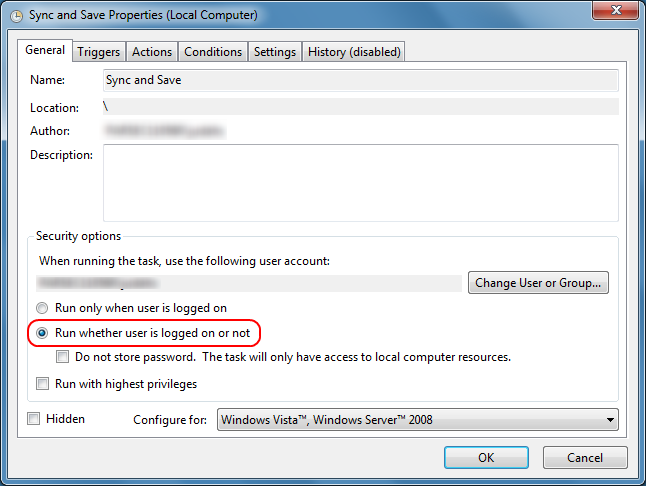
Check off "Run whether user is logged on or not" to allow the task to run with no logged in user.
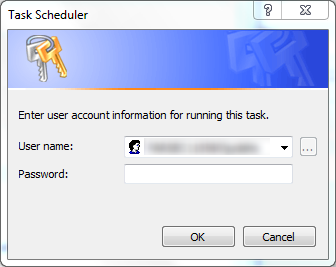
You will be prompted to enter an account for the task to use when you click OK on the task properties:
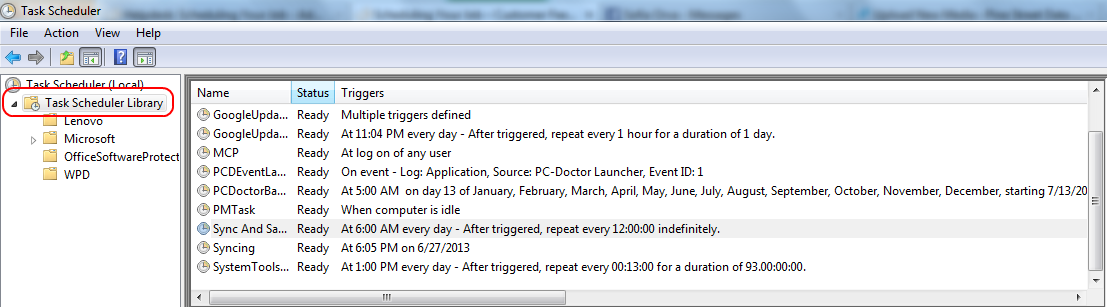
After your task is saved, you can find it again by selecting the Task Scheduler Library to filter down the list of tasks: