Submissions: Exporting To Salesforce.com
Requirements
In order to connect Sync & Save to SalesForce, the following is required:
- A license for Sync & Save that includes SalesForce.
- A license for SalesForce that includes API access.
- A user account for SalesForce that can be used for integration. See here for instructions on selecting a user account.
Settings
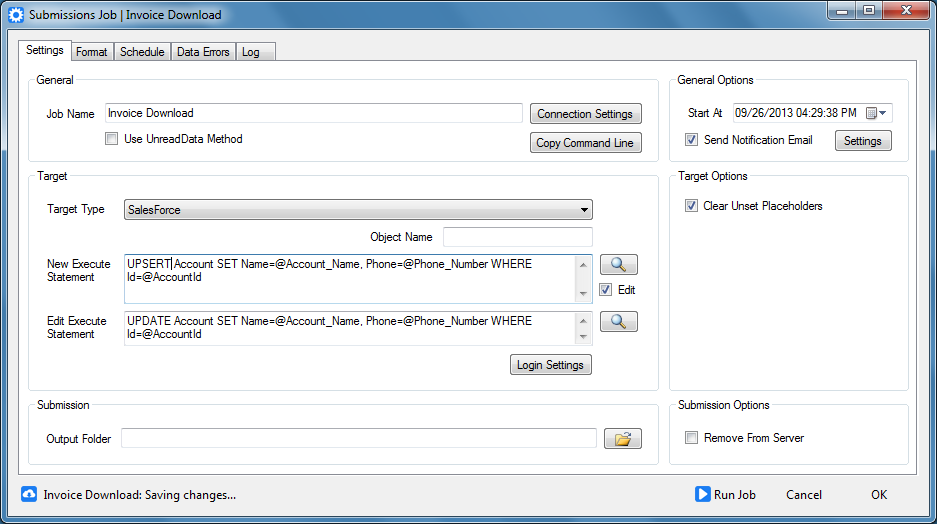
- Enter statement(s) for Sync & Save to execute against Salesforce.
- Parameters should begin with @ and should match the name of a field configured on the format tab.
- Separate multiple statements with semicolons.
- See below for more information on statement syntax.
- Enter the username and password of a Salesforce account that has rights to the fields and objects the statement(s) will affect by clicking Login Settings.
- Note that if you are outside your organization's trusted networks, you must include a security token in the password. For instance, if your password is "mypassword" and your security token is "1234asdf" then the password field should contain the value "mypassword1234asdf". In Salesforce, go to My Settings | Personal | Reset My Security Token to get your security token.
- See here for more details on security requirements.
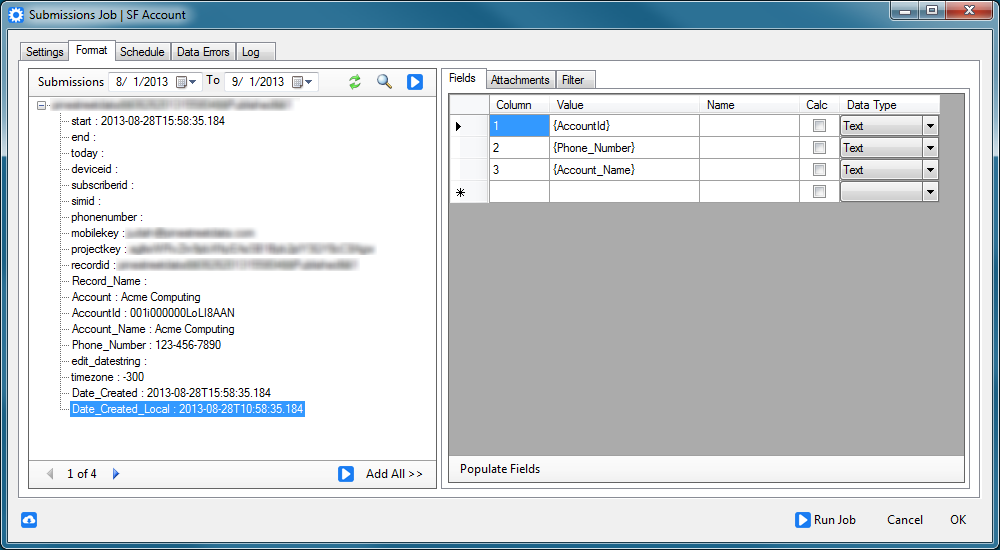
- Build the format as usual.
Statement Syntax
Sync & Save can execute three different types of commands against Salesforce data:
- INSERT
- Use this command to add new records to a table.
- Example: "INSERT INTO Lead (Company, FirstName, LastName, Description) VALUES (@Company, @First_Name, @Last_Name, @Description)"
- This command will add a new Lead with the Company, FirstName, LastName and Description fields populated by the values present in the Company, First_Name, Last_Name and Description columns configured on the Format tab.
- UPDATE
- Use this command to update existing records.
- The WHERE clause is required.
- The field used in the WHERE clause must be a unique field in Salesforce. Normally this will be the Id field, but it could also be a custom field that has been marked unique.
- Example: "UPDATE Contact SET FirstName = @FirstName, LastName = @LastName WHERE Id=@ContactId"
- This command will update the Contact whose Id is equal to the value in the ContactId column configured on the Format tab.
- UPSERT
- Use this command if you are unsure if the record exists. If it does not exist it will be created, if it exists, it will be updated.
- Example: "UPSERT Account SET Name = @Name, Phone = @Phone, Fax=@Fax WHERE MyCustomId__c = @CustomId"
- If an Account exists where MyCustomId__c is equal to the value in the CustomId column, then the account Name, Phone and Fax fields will be updated. If there is no match with MyCustomId__c, then an Account will be created with the values for Name, Phone and Fax.
- UPSERT statements can also use the standard Id field for a table in the WHERE clause.
You can mix command types in a single submissions job by separating commands with a semicolon.
Note that if you are using a Table, Grid or Repeatable in your form, Sync & Save might create multiple data records from a single submission. Check the "One Record Per Submission" option to avoid this. Each Salesforce statement will be executed once for each data record.
Sync & Save PLUS Salesforce supports a simple CASE statement format (example below).
Sync & Save PLUS Salesforce does NOT support any of the following Sql syntax elements:
- Multiple fields in the WHERE clause
- JOIN, GROUP BY or HAVING clauses
- Any Sql language functions such as REPLACE or GETDATE
Sync & Save uses version 45 of the Partner WSDL.

Update Related Tables
You can update or insert into related tables by specifying the base table in the Object Name field. The first statement that operates on that object will store the id of the affected record. The id can then be used in subsequent statements.For example, to add an Account, and then add a related Contact and Opportunity connected to the Account, set the Object Name as "Account". Then use an @AccountId parameter in later statements even though there is no AccountId field in the form:
INSERT INTO Account (Name, Phone) VALUES (@CompanyName, @Phone);INSERT INTO Contact (AccountId, FirstName, LastName, Email) VALUES (@AccountId, @FirstName, @LastName, @Email);INSERT INTO Opportunity (AccountId, Name, Amount) VALUES (@AccountId, @OpportunityName, @OpportunityAmount);Statement Examples
- "INSERT INTO Contact (FirstName, LastName, Phone, AccountId) VALUES (@First_Name, @Last_Name, @Phone_Number, @AccountId)"
- This statement will add a contact and assign it to the Account whose Id field is populated into the AccountId field.
- "INSERT INTO Lead (FirstName, LastName, Phone, Email, LeadSource, Company) VALUES (@First_Name,@Last_Name,@Phone_Number,@Email, 'Other', @Company)"
- This statement will add a lead and set the Lead Source to Other.
- "UPDATE Task SET Status = CASE @TaskStatus WHEN 1 THEN 'In Progress' WHEN 2 THEN 'Deferred' WHEN 3 THEN 'Completed END WHERE Id = @TaskId
- This statement will update the status of a specific task, translating the numeric values of @TaskStatus into text values that match the available status values.
- This statement will update the status of a specific task, translating the numeric values of @TaskStatus into text values that match the available status values.
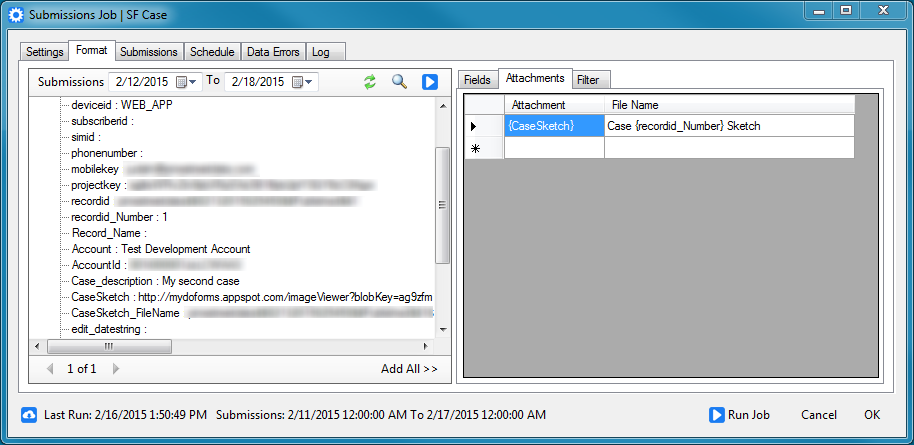
Attachments
- Beginning with version 1.11 attachments can be exported directly to Salesforce.com
- Instead of configuring an export path, configure the file name. No extension is needed. In this example the file name will be "Case 1 Sketch".
- If an edited submission is being exported the file will be uploaded as a new version.
- All attachments will be added to the Salesforce Chatter feed and attached to the last record affected by the Execute Statement (in the object designated in the Object Name field) configured on the Settings tab.